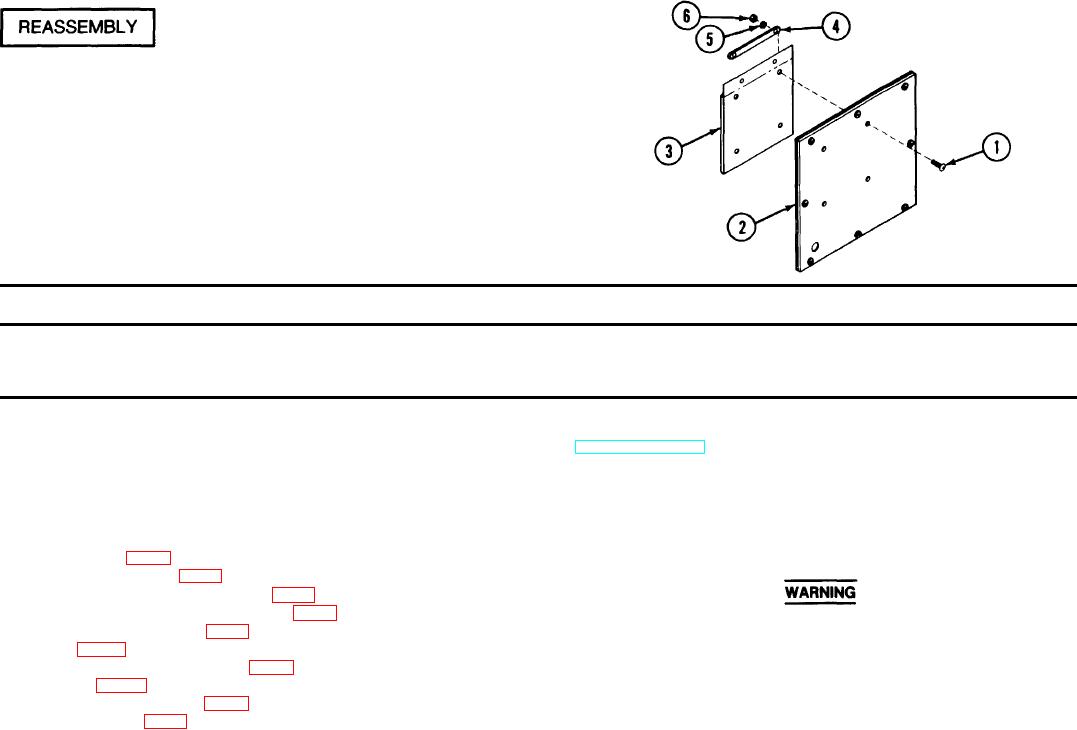
Access Cover/
Insert four machine screws (1) through holes in cover
Machine screws (1)
panel (2), tool carrier (3), and two pouch strips (4).
Cover panel (2)
Tool carrier (3)
Pouch strips (4)
Install four lock washers (5) and hexagon plain nuts (6)
Lock washers (5)
and tighten.
Hexagon plain nuts (6)
2-12. PUMP UNIT.
This task covers
c. Repair
a. Disassembly
d. Reassembly
b. Cleaning/Inspection
References
INITIAL SETUP
TM 5-2805-259-14
Tools and Special Tools
Automotive Maintenance and Repair Shop Equipment, Less Power
Equipment Condition
(SC 4910-95-CL-A72 and SC 4910-95-CL-A74)
Engine and pump unit protective cover and pump unit cover panels are
removed and fuel is drained from fuel tank.
Materials/Parts
Special Safety Instructions
Adhesive (item 1, app D)
Antiseizing tape (item 35, app D)
Chassis and running gear brush (item 5, app D)
Chemical and oil protective gloves (item 21, app D)
Battery and battery compartment area may be coated with acid due to
Dry cleaning solvent (item 14, app D)
spillage and/or fumes. Wear protective clothing when working in this area.
Fire hose (fig E-1)
Before eating, smoking, or touching your face or clothing, wash your hands
General purpose detergent (item 12, app D)
with a solution of baking soda and water, then flush them with clear water. If
Rubber strip (fig E-2)
battery acid gets into your eyes, flush them with clean water. Obtain medical
Sodium bicarbonate (item 32, app D)
treatment immediately. Failure to do so may cause blindness.
Wiping rag (item 30, app D)
TM 3-4230-209-20&P
2-47

